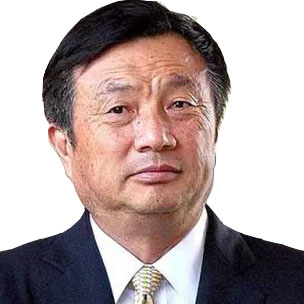
关于作者

姓名:Jacky

性别:男

出生日期:2000-01-01

地区:湖南-上海

联系电话:021110

QQ:51132530婚否:未婚
用户名:zmg229
笔名:远离尘嚣
地区: 湖南-上海
行业:其他

日历  

快速登录

+ 用户名:
+ 密 码:

在线留言


〖JavaTech〗

〖DotNetTech〗

〖Ajax 站 点〗

〖Google sites〗


〖文 学.文 艺〗

〖博 客 同 道〗

〖专 家 链 接〗

〖OpenSource Sites〗

〖媒 体 链 接〗

〖我 的 网 志〗

〖访 者 分 布〗

Locations of visitors to this page

〖我 的 幻 灯〗


〖博 客 摘 要〗

〖设计.艺术〗

媒体设计与艺术

〖XMLTech〗

〖 论 坛 〗

〖在 線 遊 戲〗

〖Flex/Flash & AS〗

Flex.org - The Directory for Flex

〖数 据 库〗

〖UML.软件工程〗

〖IT 厂 商〗

〖在线电子书〗

〖Flash ActionScript程序语言〗

〖Ruby程序语言〗

〖Python/Jython程序语言〗

〖TV Online〗

〖Music〗

〖Private〗

访问统计:
文章个数:126
评论个数:132
留言条数:7


Powered by BlogDriver 2.1

远离尘嚣


千山我独行 不必相送

文章

已锁定
此日志的浏览权限已被作者锁定,请同作者联系,发送短消息,如果你的身份符合作者的要求,点击此处可以进行浏览

- 作者: 远离尘嚣 2008年08月5日, 星期二 22:38  回复(0) |  引用(0) 加入博采

Mac OSx Leopard下从源码编译安装Fink 0.81(原创)
由于安装了新的mac osx系统leopard,所以得再次安装Fink, 下载下来最新的Fink版本0.81的dmg安装文件,很遗憾,不支持leopard, 尝试从源码编译安装Fink 0.81, 因为官网上有消息,可以在leopard上编译安装。下载好源码,进入解压后的目录里,执行:
./bootstrap.sh /sw
出错,报
Sorry, your /usr/bin/perl is version 5.008008, but Fink can only use
5.6.0 (5.006), 5.6.1 (5.006001)
5.8.0 (5.008), 5.8.1 (5.008001), 5.8.2 (5.008002), 5.8.6 (5.008006)
尝试执行:
perl bootstrap.pl
出错依旧,看来本机leopard自带的perl版本有点新,没关系,修改bootstrap.pl文件,在此处:
my %ok_perl_versions = (
"5.006" => "5.6.0",
"5.006001" => "5.6.1",
"5.008" => "5.8.0",
"5.008001" => "5.8.1",
"5.008002" => "5.8.2",
"5.008006" => "5.8.6"
);
加一行,改为如下:
my %ok_perl_versions = (
"5.006" => "5.6.0",
"5.006001" => "5.6.1",
"5.008" => "5.8.0",
"5.008001" => "5.8.1",
"5.008002" => "5.8.2",
"5.008006" => "5.8.6",
"5.008008" => "5.8.8"
);
现在应该 可以通过Perl版本的检查了吧,继续重复上面的命令,跳过了Perl版本检查,一路顺利,问了N多问题,可以一路默认,直到最后,又跳出一个出错提示,还说Perl版本不在支持之列,再查找源码检查Perl版本的地方,通过搜索,找到文件:Bootstrap.pm源码文件此处
} elsif ("$]" == "5.008") {
} elsif ("$]" == "5.008001") {
} elsif ("$]" == "5.008002") {
} elsif ("$]" == "5.008006") {
} else {
加一行,改为:
} elsif ("$]" == "5.008") {
} elsif ("$]" = "5.008001") {
} elsif ("$]" == "5.008002") {
} elsif ("$]" == "5.008006") {
} elsif ("$]" == "5.008008") {
} else {
保存一下,重复再执行命令:
./bootstrap.sh /sw
一切顺利,直至安装完成。喝喝...
最后把fink命令的所在路径置于PATH之中,也可以偷情,执行:
/sw/bin/pathsetup.sh

当然,别忘记了安装完成后,执行fink的自升级检查:
fink selfupdate-rsync 或 fink selfupdate-cvs

- 作者: 远离尘嚣 2008年03月21日, 星期五 01:03  回复(0) |  引用(0) 加入博采

已锁定
此日志的浏览权限已被作者锁定,请同作者联系,发送短消息,如果你的身份符合作者的要求,点击此处可以进行浏览

- 作者: 远离尘嚣 2007年09月2日, 星期日 17:44  回复(0) |  引用(0) 加入博采

mac osx和win下集成Apache2.2.4 & svn 1.4.4
一 WIN下
1. 安裝
下載apache2.2.4,解壓後,用命令行窗口切換到%apache_home%\bin下,執行 httpd -w -n "Apache2" -k start(注: apache2為註冊好的apache2.2.4服務名),在瀏覽器地址欄輸入: http://localhost 顯示'it works!',正apache2服務器正常啟動
下載svn 1.4.4,解壓,拷貝%SVN_HOME%\bin下的兩個so文件至%Apache_home%\modules目錄下, intl3_svn.dll和libdb44.dll則拷貝到%Apache_home%\bin目錄下

2. 配置
編輯%apache_home%\conf\httpd.conf文件,放開註釋:
LoadModule dav_module modules/mod_dav.so
LoadModule dav_fs_module modules/mod_dav_fs.so
 添加:
LoadModule dav_svn_module modules/mod_dav_svn.so
LoadModule authz_svn_module modules/mod_authz_svn.so


DAV svn
SVNParentPath "E:/data/svn-repos/repository"
SVNListParentPath on

# 认证信息,即限制访问身份配置
AuthType Basic
AuthName "SVN repository"
AuthUserFile E:/data/svn-repos/conf/svn-auth
Require valid-user


保存,重啟apache即可,集成完成。
用apache自带命令工具htpasswd创建用户密码文件:
E:/data/svn-repos/conf/>%APACHE_HOME%\bin\htpasswd -cm svn-auth jacky
E:/data/svn-repos/conf/>%APACHE_HOME%\bin\htpasswd -m svn-auth zhang
过程中会询问要设置的密码

然后打開瀏覽器,在地址欄輸入: http://localhost/svn/,输入认证信息后,將會列出目前的repository(為空)

3. 初始化svn
用命令svnadmin創建一個初始repository:(將會創建目錄E:/data/svn-repos/repository/repos1)
c:\>svnadmin create --fs-type fsfs E:\data\svn-repos\repository\repos1\firstAIR
导入初始工程:
c:\>svn import E:\data\project\firstAIR file:///E:/data/svn-repos/repository/repos1/firstAIR -m "初始化firstAIR项目"

然後客户端就可以用命令checkout這個repository下版本庫了
d:\>svn checkout http://localhost/svn/repos1/firstAIR

4. 亂碼問題
svn help命令時,有亂碼,解決辦法如下,加入系統環境變量:
LANG =zh_CN.UTF8
APR_ICONV_PATH = %SVN_HOME%\iconv

二 mac OSX下
1. 下载subversion for mac osx,建议下载dmg镜像安装.安装完后,svn会将分布文件到多个路径中,情况如下:
/usr/local/bin: This is where the Subversion executables will be installed.
/usr/local/lib: This is where Subversion and it's dependency libraries will be installed.
/usr/local/lib/svn-apache: This is where the Subversion Apache modules will be installed.
/usr/local/lib/svn-javahl: This is where the Subversion Java bindings (JavaHL) will be installed.
/usr/local/lib/svn-perl: This is where the Subversion Perl bindings will be installed.
/usr/local/lib/svn-python: This is where the Subversion Python bindings will be installed.
/usr/local/lib/svn-ruby: This is where the Subversion Ruby bindings will be installed.
/usr/share/man: This is where the Subversion and it's dependency man pages will be installed.
2. 用sudo vi /etc/profile命令,将/usr/local/bin目录追加到PATH系统环境变量中去,此时执行:
$ svn --version
svn, version 1.4.4 (r25188)
compiled Jun , 14:23:02

Copyright (C) CollabNet.
Subversion is open source software, see http://subversion.tigris.org/
This product includes software developed by CollabNet (http://www.Collab.Net/).

The following repository access (RA) modules are available:

* ra_dav : Module for accessing a repository via WebDAV (DeltaV) protocol.
- handles 'http' scheme
- handles 'https' scheme
* ra_svn : Module for accessing a repository using the svn network protocol.
- handles 'svn' scheme
* ra_local : Module for accessing a repository on local disk.
- handles 'file' scheme
/usr/local/svn_installer_backup: This is where the Subversion installer will move any files that needed to be "overwritten".
3. copy /usr/local/lib/ svn-apache下的*.so到 /Library/Apache2/modules目录下,
$ cp /usr/lib/svn-apache/*.so /Library/Apache2/modules
4. 修改/Library/Apache2/conf/httpd.conf文件,如下:
LoadModule dav_svn_module modules/mod_dav_svn.soLoadModule authz_svn_module modules/mod_authz_svn.so

DAV svn
SVNParentPath "/Users/minggui/data/svn-repos"
SVNListParentPath on

# 认证信息,即限制访问身份配置
AuthType Basic
AuthName "SVN repository"
AuthUserFile /Users/minggui/data/svn-repos/repos1/conf/svn-auth
Require valid-user

5.初始化svn源码库
$ svnadmin create --fs-type fsfs /Users/zhangminggui/data/svn-repos/repos1
$ svn import /Users/minggui/data/projects/testGrailsApp file://///Users/minggui/data/svn-repos/repos1 -m "init test grails app"
6. 设置svn账号及密码
$ htpasswd -cm svn-auth jacky
New password:
Re-type new password:
Adding password for user jacky
$ htpasswd -m svn-auth zhang
New password:
Re-type new password:
Adding password for user zhang
$ ls
authz passwd svn-auth svnserve.conf
6. 最后启动apache服务,在浏览器地址栏中输入url即可访问svn源码库
$sudo apachectl start
URL访问: http://localhost/svn

- 作者: 远离尘嚣 2007年07月3日, 星期二 17:49  回复(1) |  引用(0) 加入博采

在OSX Tiger下编译Apache 2.2.4源码
1. 下载apache http server 2.2.4源码,然后解压缩到临时目录中
2. 升级XCode开发环境中的gcc版本到4.0, XCode安装程序包可以到Apple官方下载.若是在gcc 3.3版本下,执行./configure时,会报错,如下:
... ...
checking for C compiler default output file name… configure: error: C compiler cannot create executables.
... ...
3. 在命令行中,切换当前目录到源码解压缩目录中,修改configure.layout文件,在末端追加如下配置段:
<Layout Richard5>
  prefix: /Library/Apache2
  exec_prefix: ${prefix}
  bindir: ${exec_prefix}/bin
  sbindir: ${exec_prefix}/bin
  libdir: ${exec_prefix}/lib
  libexecdir: ${exec_prefix}/modules
  mandir: ${prefix}/man
  sysconfdir: ${prefix}/conf
  datadir: ${prefix}
  installbuilddir: ${datadir}/build
  errordir: ${datadir}/error
  iconsdir: ${datadir}/icons
  htdocsdir: ${datadir}/htdocs
  manualdir: ${datadir}/manual
  cgidir: ${datadir}/cgi-bin
  includedir: ${prefix}/include
  localstatedir: ${prefix}
  runtimedir: ${localstatedir}/logs
  logfiledir: ${localstatedir}/logs
  proxycachedir: ${localstatedir}/proxy
</Layout>
然后保存,也可以直接下载本文件,替换原文件.
4. 在命令行中执行:
sudo

CFLAGS="-arch ppc -isysroot /Developer/SDKs/MacOSX10.4u.sdk" \
./configure --enable-layout=Richard5 \
--enable-mods-shared=all \
--with-ssl=/usr \
--with-mpm=prefork \
--enable-ssl \
--enable-dav \
--enable-cache \
--enable-proxy \
--enable-shared \
--disable-static \
--disable-unique-id \
--disable-ipv6 \
--enable-logio \
--enable-deflate \
--with-ldap \
--with-ldap-include=/usr/include \
--with-ldap-lib=/usr/lib \
--with-included-apr \
--enable-ldap \
--enable-auth-ldap \
--enable-cgi \
--enable-cgid \
--enable-suexec
5.

- 作者: 远离尘嚣 2007年06月10日, 星期日 22:38  回复(0) |  引用(0) 加入博采